Phoenix OS is an operating system made for PC’s running Windows and we’re going to Dual Boot it.
Most of the Legacy devices are incapable of running recent Windows versions like Windows 8/8.1 and 10, So Organizations like Phoenix OS developed an operating system which is capable of running in Legacy and slower devices and offer Almost every feature that Windows can do by offering Dual Boot Phoenix OS Android Installation that can run in x86 architecture
Dual Boot Phoenix OS : What Advantages we get?
- Phoenix OS consumes less ram when compared to most Windows Distributions like Windows 8/8.1/10.
- When Android can run smoothly in Mobile Devices then it can outrun in PC’s with obvious Higher Configuration.
- Phoenix OS is designed in x86 Architecture so it can run smoothly on any Intel based computers, .
- Most users don’t need all the features what a Windows or Mac can do. They just need a Good snappy device to perform their daily tasks like checking Mails, Watching YouTube Videos, and some Browsing which is the main point these days
- That’s why Google is Targeting those people by Launching Chromebooks which is a great success from my perspective. So having an Android Phone can perform these tasks then why not have an Android that runs in a PC
- The best part of this tutorial is you need not sacrifice your good old slow Windows Operating System. Dual Boot Phoenix OS runs parallel without any Problem.
- Very good choice for laptops having low hard drive space. Recently market is flooded with less storage cheap laptops offering hard disk space around 32-64 gigs. They’re comprised of SSD’s which are quite faster than normal HDD’s but in some cases, dual boot Phoenix OS helps us a lot.
Instructions: Dual Boot Phoenix OS
- Go to Phoenix OS Website or Search for Phoenix OS in Google. Then download the Phoenix OS installer under Downloads Section from the Website
- Now create a dedicated Empty Partition for the Phoenix OS installation, Or else you can use your existing Partitioned Drives which you normally use for storing data in Windows Environment ( c,d,e,f…. etc.,)
- To Create the Partition you have to open ” Disk Management ” in Control Panel or you can use ” WIN + X” and Select Disk Management from the Pop Under Dialog Box. Then Shrink any of your Drives which has some Free Space lets say more than 16 Gigs because Phoenix OS Requires At least 16 Gigs of Storage
- Right click on the Un-allocated Free Space and select Create New Simple Volume.
- Select NTFS as Your Partition Format and Then click Finish. Now you’ll get a New Partition for our Dual Boot Phoenix OS Installation
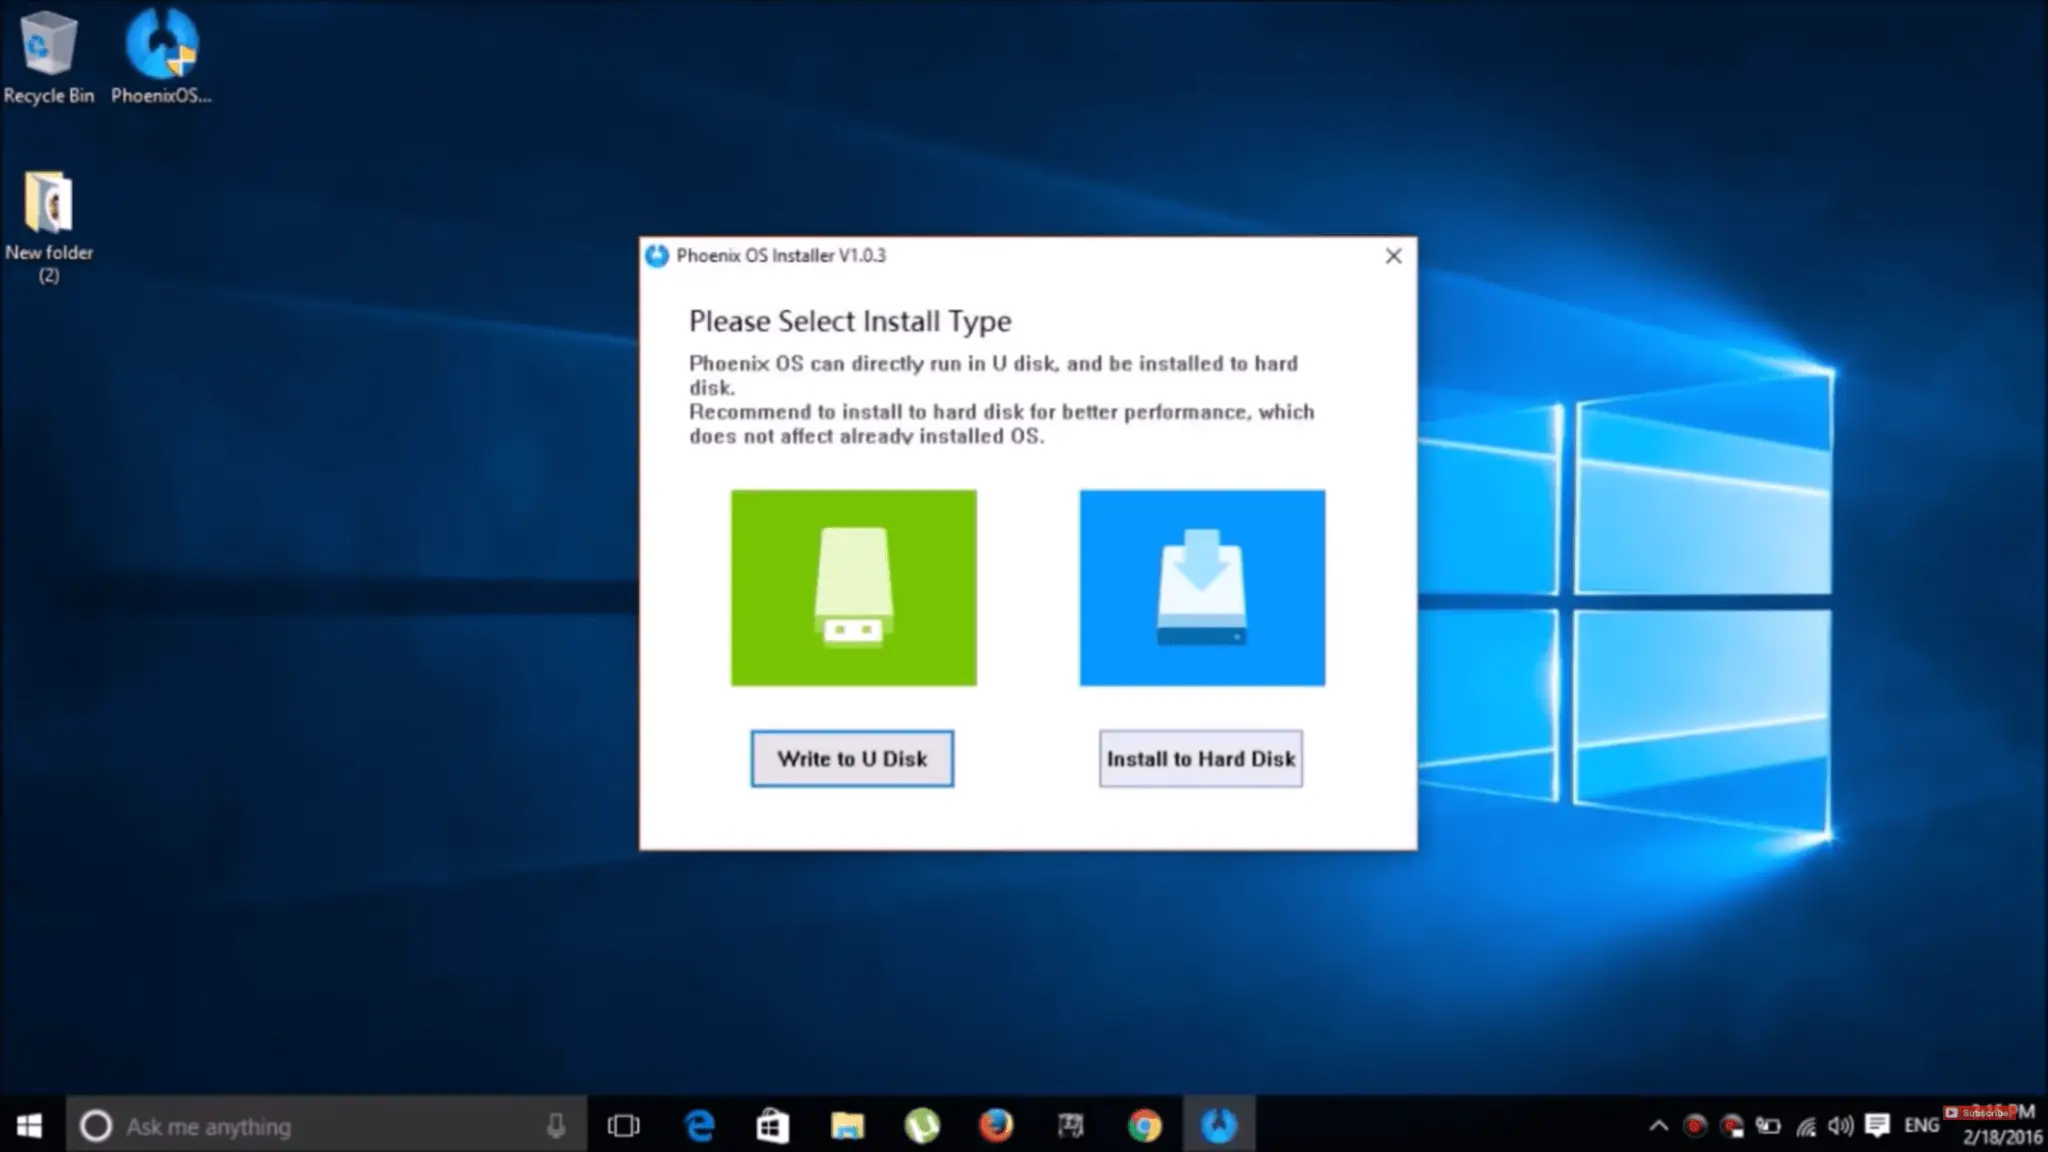
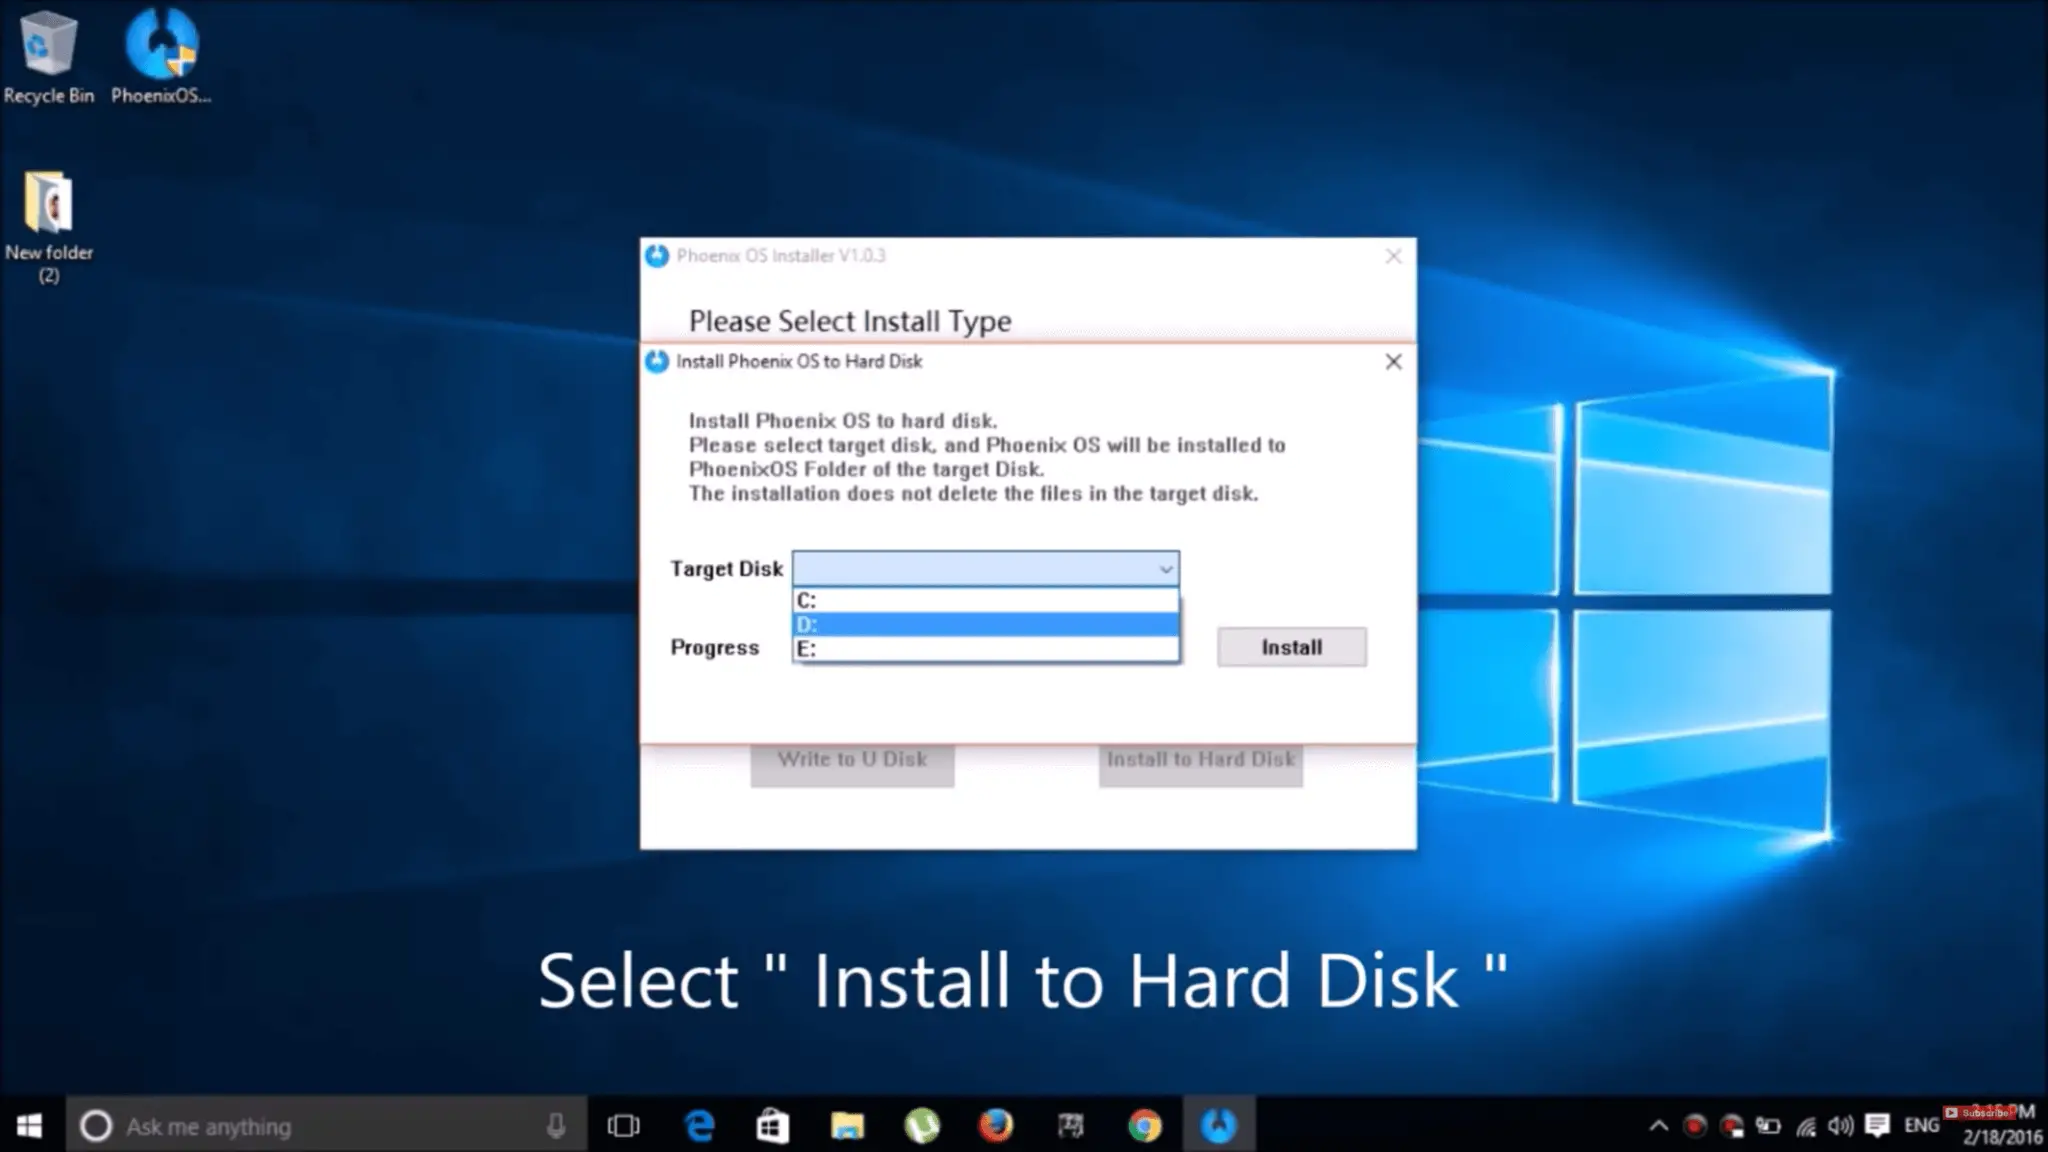
- Open previously downloaded Phoenix OS Installer and Select the Target disk which is Obviously the Newly Created Partition. Or you can go with any drive as I’ve said earlier.
- Finally, select ” Install to Hard Disk ” option and wait for 5-10 Minutes until the Phoenix OS Installer finishes the Extraction Procedure for our Dual Boot Phoenix OS installation. After that you’re good to Go.
- To boot into Phoenix OS Installation, you need to Restart the PC and you’ll find a Successful Dual Boot Phoenix OS Installation.
- Every time you start your PC you’ll get both Windows and Phoenix OS installations to choose from.
Video Tutorial: How to Dual Boot Install Phoenix OS on Windows 7,8,10
if you’re Lazy to Read the Tutorial. Watch the Video Tutorial instead.
Also Check: Dual Boot Cub Linux
Do let me know if you are having any doubts in the comments section below.